Alright
It's already time for another issue of the Error Logs, you lucky lucky people. Thank February for that.
This month you get a full-fat edition featuring a spotlight on Japanese glitch collagist Kosuke Kawamura, some glitchy music videos early 00s band Sunna, and a whole-arse tutorial on Processing script Decompose Paint.
News
Absolutely nothing to report on for this month. No news. No exhibitions. No art. It's a barren wasteland out there.
I thought about renaming this section to "Olds" and just copying and pasting last month's News.
Or just making any old shit up and hoping nobody would notice:
"Mark Zuckerberg admits that the bugs in Facebook were intentional as he reveals the most ambitious glitch art performance in history."
"Sealions discovered to make glitch art when stressed."
"Midwife fired after datamoshing ultrasound videos. Expecting mothers OUTRAGED."
But my journalistic integrity prevents me from doing either of things. Probably why I'd never make it as a journalist.
So, what are we doing here?
....
Listen.. come a little closer... Not that close. Don't make this weird.
Look. Things are getting crazy out there. And I know it’s chilling the things that are happening right now. And I understand people who don’t want to put themselves in harm’s way.
We’re taught in all those Hollywood stories and Japanese RPGs (the ones with emo dudes with spiky hair) that it’s the lone hero that will come to save us. And not to diminish people we celebrate who actually did that (and there are some), but it’s a reductive way of thinking. There’s no knight in shining armour coming.
But you know why? Because he/she/they is sat behind a computer saying "when will people open their eyes and do something"
Decades of individualism has eroded society and weakened communal bonds, diminishing our ability to unite and mobilize effectively as a group (at least those lucky enough to be in the majority - minority groups are historically forced to find safety in numbers, and they’ve been on the front line already protesting the current shitshow).
The good thing about collective movement is that it doesn't need some lone hero to stand up and get burned at the stake (or zip-tied and silenced in a town hall meeting)
That's why the first step is to rebuild those groups. Find like-minded groups who want to take action and change things. Or just find the people and make your own groups and reach out to make bigger networks.
Think about actions you can take to bring about change; Buy local rather than from big corps supporting this, start taking your money out of banks, financially support those going on strike, join protests that are happening right now (I’m not even an American living in the US but I know there have been protests at Tesla dealerships). Big and small acts of subversions.
Check out The Politics of Nonviolent Action by Gene Sharp as a good starting point.
They say that any non-violent protest that includes more than 3.5% of the population has never failed to bring about change.
Now is the time to start finding like-minded people and asking what you can do as a group.
You don't have long to mobilize before the gates shut close.
Spotlight: Kosuke Kawamura
After a hiatus of a couple of months, I'm finally doing another artist spotlight. How could I possibly find the time? Well, luckily I had a couple of really long train journeys, and writing these is a lot more fun that looking at some salaryman's armpit for an hour (not to kink shame or anything).
I'm continuing the theme of trying to highlight Japanese artists after my last feature on Yuni Yoshida, especially glitch or glitch adjacent artists.
This month we're going to be looking the artist, graphics designer and artistic director, Kosuke Kawamura.
As I've mentioned in previous issues, it's kind of rare to find specifically glitch artists in Japan; they tend to either exist in other genres and make art that just has a glitch aesthetic, or they make work more broadly and glitch is just a single tool in their arsenal.
Kawamura, primarily a collagist, seems to straddle both. He makes physical collages where the images are corrupted and subverted into something new, but he's not averse to wacking out a circuitbent video or two.
But don't just take my words for it, here's the totally 100% accurately machine translated words of some website.
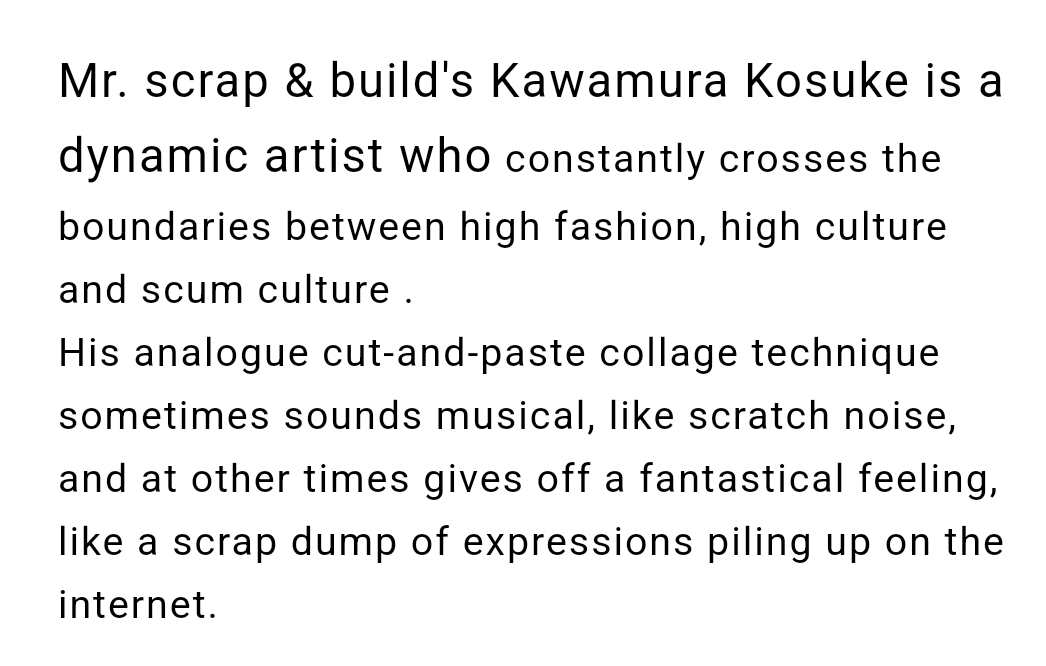
I can only hope to one day be described in such glowing terms.
Actually, I thought scum culture was just a bad translation but seems to be a reference to Masami Akita, AKA Merzbow, a Japanese Noise musician (who I've referenced a couple of times in these logs)
Scum Culture was a book Akita published focussed on ‘extreme culture’ like Satanic Metal, Serial Killers, BDSM etc etc.
I don't know exactly what the connection between the two is. I can't seem to find any evidence of them working together, and the closest I can find is Kawamura doing some graphic design for a label that also distributes Merzbow music. It seems like Kawamura has also designed sleeves for Boris, a Japanese band that has also worked worked with Merzbow before. Seeing as Merzbow seems to have worked with pretty much anyone doing cool artistic stuff, it wouldn't surprise me if they had some connection.
Anyways, let's take a look at some of Kawamura's work.
First up is this portrait of Oasis that was made to celebrate
A: their recent momentous reunion after years of acrimony
B: a celebration of brotherly love
C: all that money they're going to make
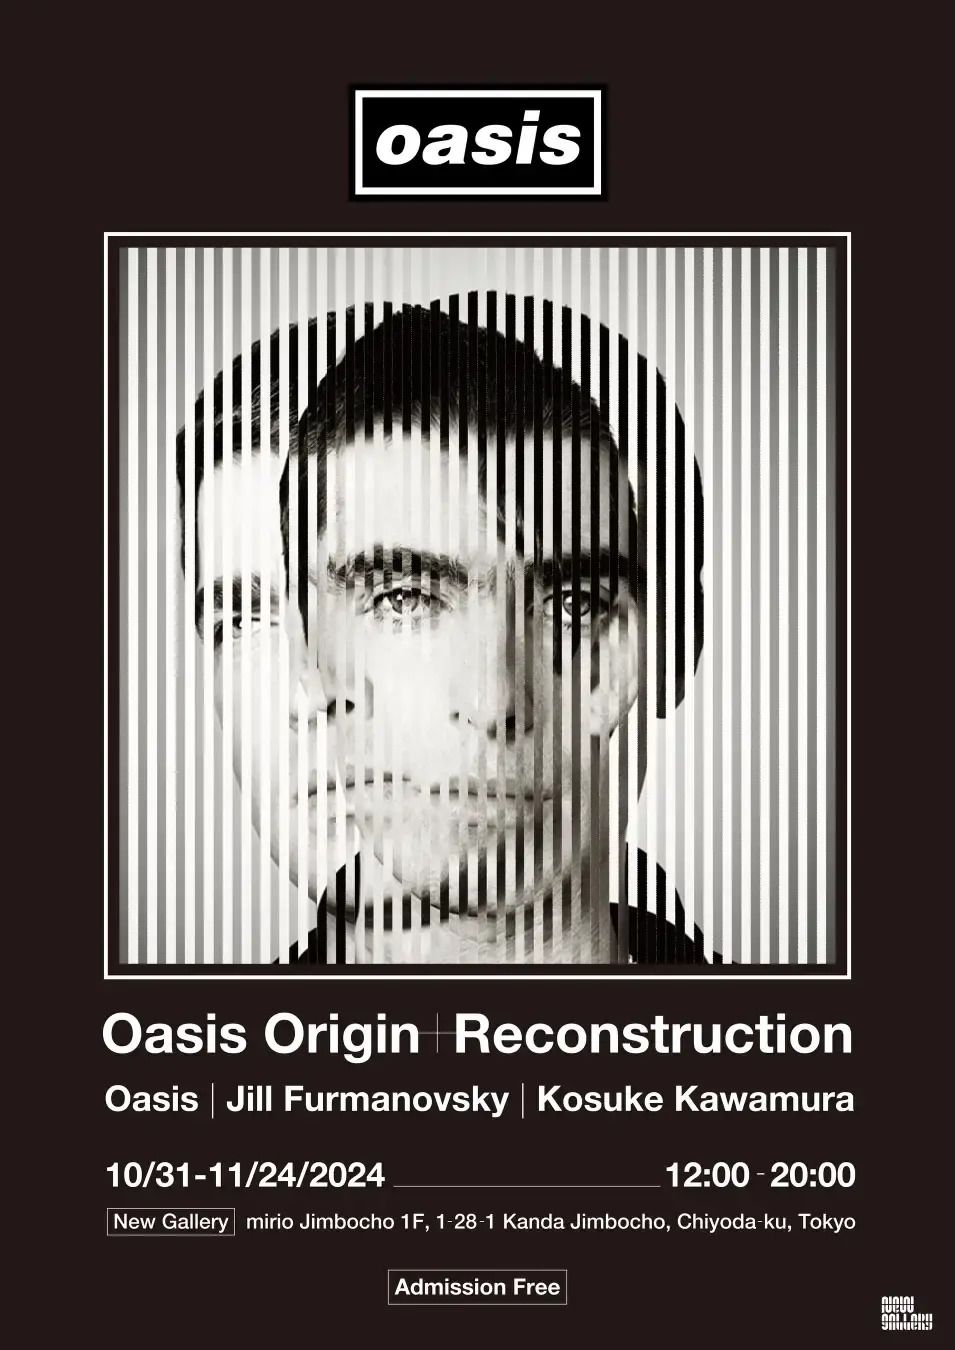
The final piece is based on two older portraits that were taken of the brothers by the renown photographer Jill Furmanovsky
I think it's quite a clever piece considering all the nonsense they've been through with their constant bickering, and it suggests they're better together (YMMV depending on your opinion of OASIS - I’ll let you decide where they fall on the Scum Culture scale.)
A lot of his works have him subverting icons of power by dissecting them and rearranging them into new forms that show them in new lights. He’s often able to do this without specifically adding any new elements into the work, and just cutting and pasting or duplicating what’s already there. I especially like his works based on The Queen

factually accurate representation of the Queen 2025
I’m not sure how he achieved that effect. I wonder if he used two different notes, one that was more faded than the other. But it creates this really cool effect where it looks like a distorted skull.
This one’s another cool example where he moved facial features around to different positions. This certainly won’t be dispelling the Illuminati Lizard people rumours any time soon
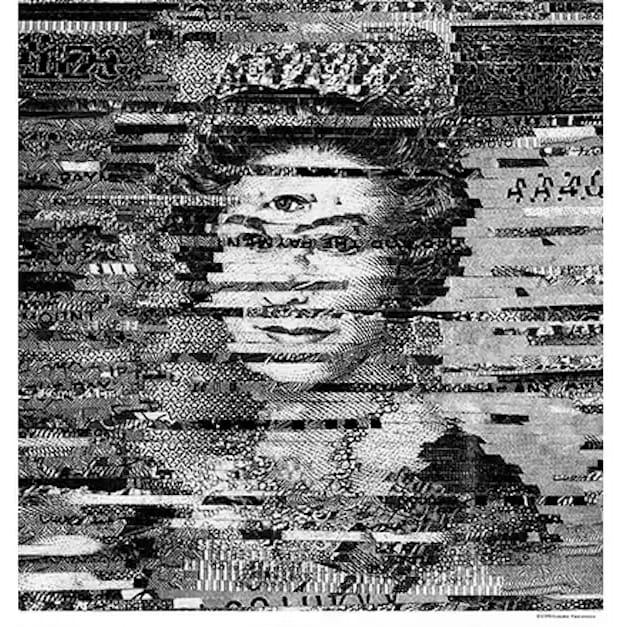
Both examples, despite being collages, have big glitch art energy to them - both aesthetically and in spirit.
He’s also done the American money guys, you know Tom Hanks and Homer Simpson
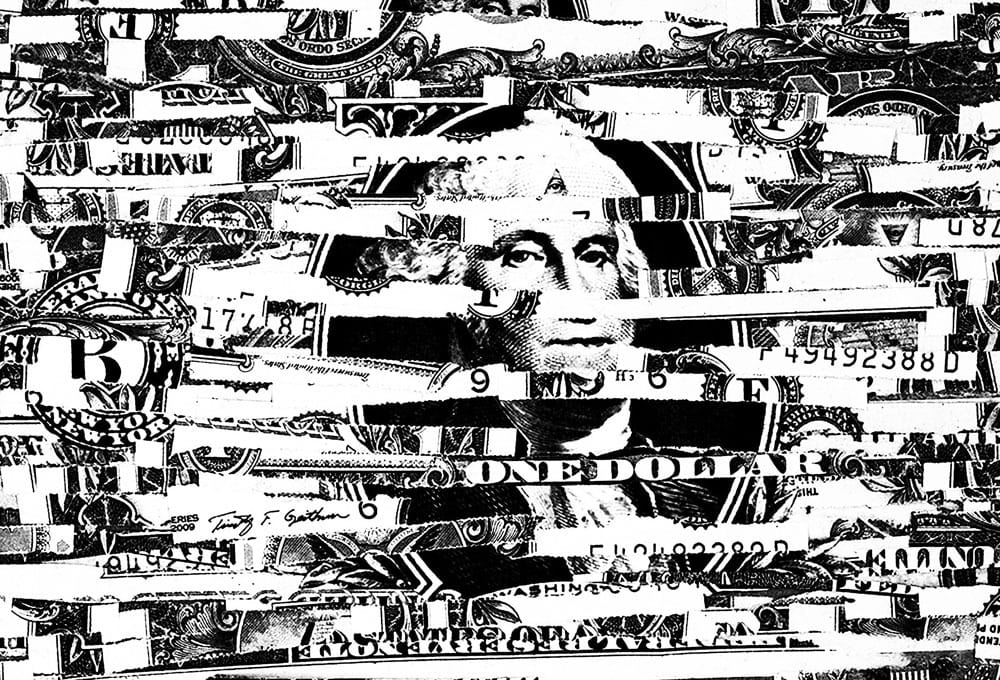

Doh!
But he’s not always sticking two fingers up to the big icons of Imperialism. Sometimes he also sticks it to the (Pac)man too. This canvas of Pacman is made from shredded pieces of paper containing text and characters from the game.
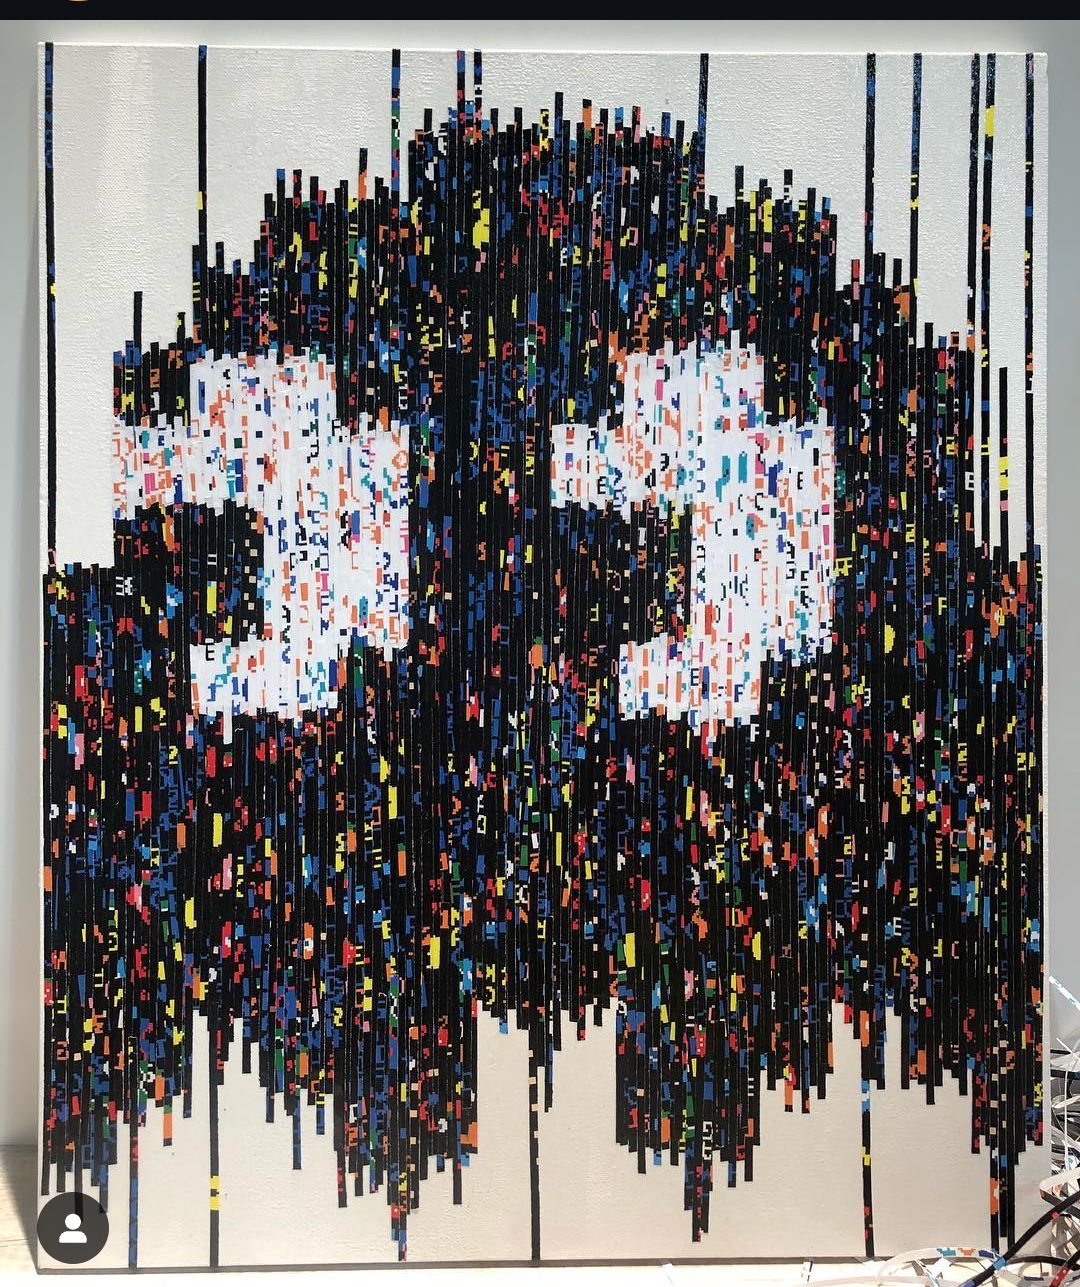
It reminds me a lot of the Corrupted Rom method of glitching where the data of the game is corrupted and it can result in scrambled visuals like this. I also like how the shredded paper has been arranged on the canvas to give it somewhat of a pixelsorted look to it.
I also really like this mixed media collage which I think also has a lot of glitch influence in its repeated forms, like a Windows error message stacking on top of itself.
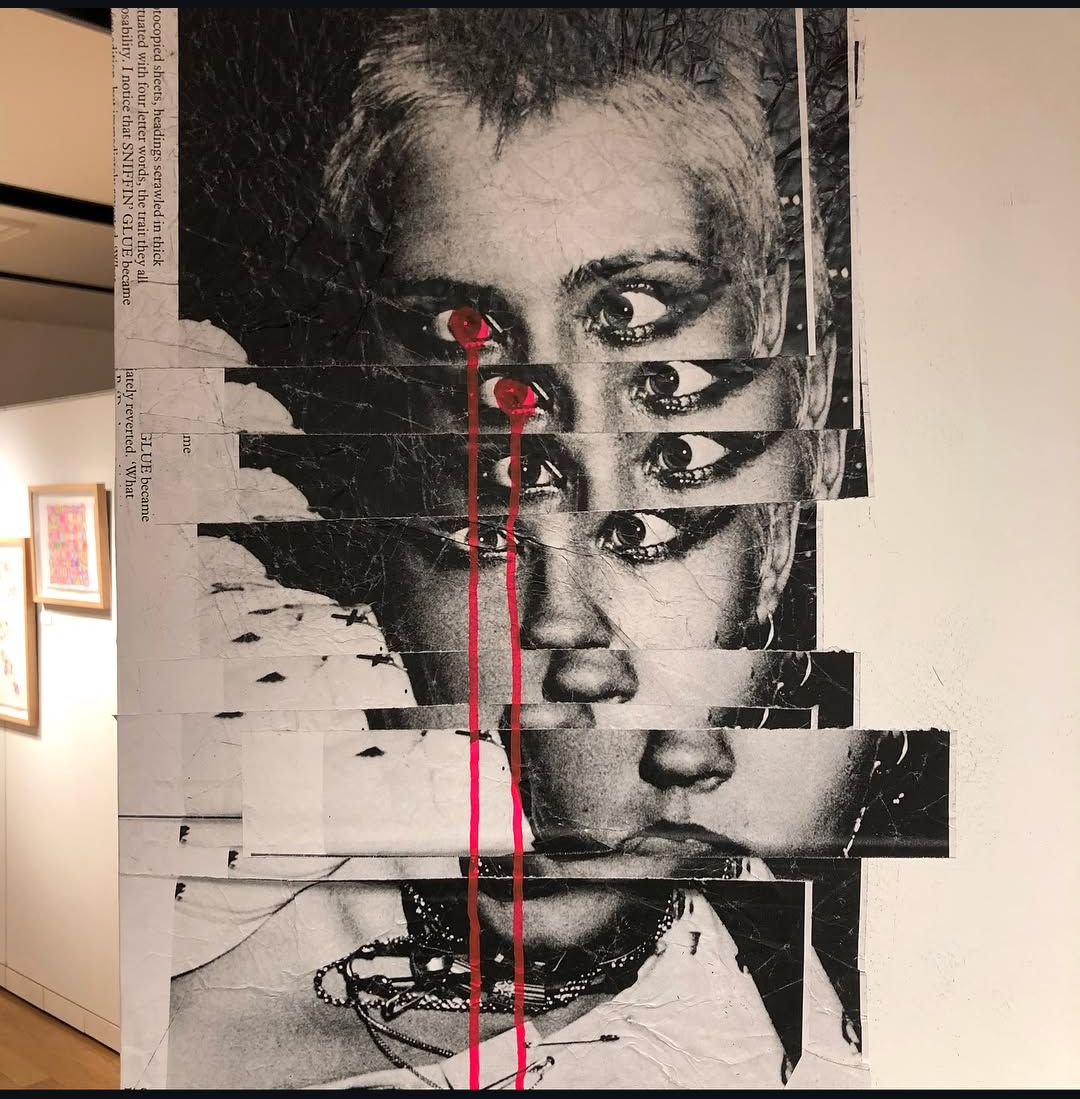
His work certainly makes me want to explore doing more mixed media glitches in the future. If you know of any other good glitch collagists, don’t be a stranger.
Glitch Music Video: Sunna - I’m not Trading
Databending purists, if you have eyes, prepare to avert them now. This is not for you.
Anyone that has been reading these newsletters for the last few issues will be familiar with slitscan. I did a slitscan Processing script tutorial in Error Logs 13, and I've mentioned it a few other times recently.
This month's video doesn't strictly use slitscan techniques (as far as I'm aware), but it does remind me of the technique a lot.
Anyways this month's Glitch Video is by a UK band called Sunna and the song is called I'm Not Trading.
The band is a little difficult to categorize in any one genre, as anyone who has listened to their first album, One Minute Science, can attest to. Their songs range from rock to industrial and a whole manner of things in between.
Their closest brush with the mainstream was with Power Struggle, which featured on the forgettable, by-numbers slasher film Hollow Man, mostly famous for treating movie-goers to a glimpse of Kevin Bacon's plump sausage. I'm Not Trading was the third single from the same album and got some pretty extensive airplay on alternative music channels. Well, in the UK at least.
I really like the song and it's stuck with me all these years. This version of Ashes to Ashes is also worth checking (sacrilege I know but I like it)
Anyways, on to the video. It's a pretty standard 'band plays in room' kind of affair. But their music is so powerful, the racks of amps and speakers so massive, that it warps and distorts the air around them.
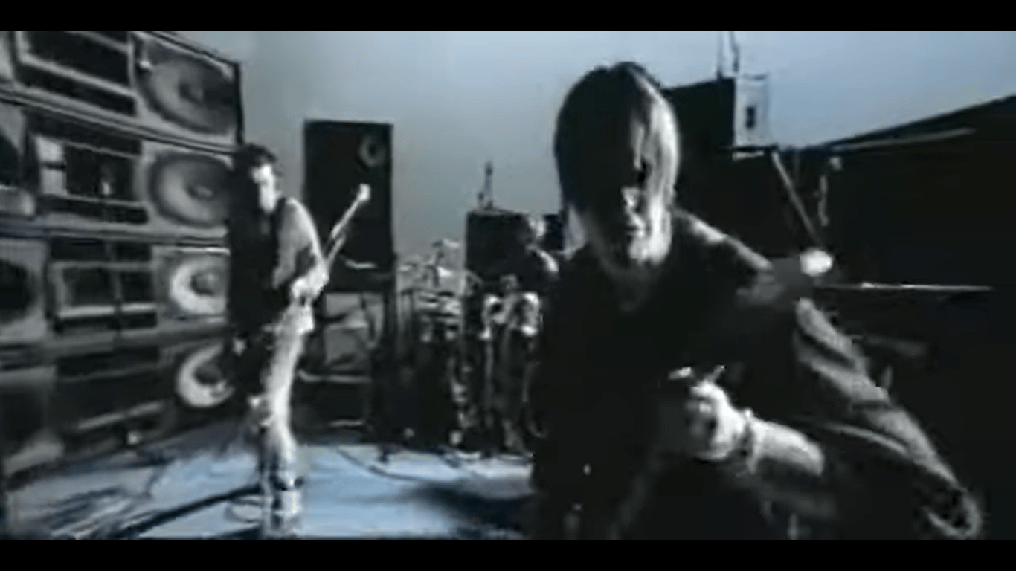
Honestly, it's not that groundbreaking as a video. Sure, it's a bit of a low budget rip-off of Freak on a Leash in some parts. There are also some elements of Nine Inch Nails Into the Void.
But I do like how it kinda of matches the music. There are a lot of parts where the the music sounds like it's being played backwards (especially in the bridge) which vibes with uncanny feeling caused by the warping
Anyway, the versions I've found online are pretty low quality, so rather than me showing off a ton of low Res compressed JPEGs (which despite being pretty much my raison d'être, isn’t really appropriate here as the compressed look wasn’t intended), you might as well watch it for yourself.
Tool time: Decompose Paint
Alright, we've had a month off from Processing, but now it's time to jump back on the GenerateMe train.
This month, we're going to be looking at tool called Decompose Paint.
So, what is Decompose Paint? Despite the name, it's not only for goths and the undead. It also seemingly has nothing to do with decomposing or painting.
I haven't been so disappointed by a misleading product name since McDonald's Japan launched an Adult Cream Pie.

大人のクリームパイ - Adult cream pie (seriously, Google Lens translate it)
Then, what is it? According to the comments written in the code

Decompose Image and Paint
Glad we've cleared that up.
I did some further research (and by further research I mean I just read the ReadMe file in the GitHub repository for GenerateMe) and found this:
decompose_paint - decompose image into sqares/rectangles and fill it with some pattern
OK, now we're getting somewhere. From what I can tell, it seems to apply some kind of algorithm similar to what you might find in image compression. For example, Quadtree Decomposition, which is where an image is divided into 4 blocks, and then each block is tested to see if each pixel within the block falls within a certain colour range. If it doesn't, the block is subdivided again into 4 more blocks and the process is repeated. If it does, the average colour for that block is calculated and all pixels are converted to that color,and only the colour data for that block is saved rather than the colour data for 12,000 pixels (that's the compression part)
A bit like this

you can see how all the pixels within each square are the same colour
Of course, this is not necessarily a compression algorithm, so the code is just deciding the size of the blocks randomly rather than with any fixed colour values in mind for compression purposes.
So after the decomposition happens, it fills the block with a pattern, kind of like the Fill function in Microsoft Paint.
Ok so the name decompose paint does make sense. Get Ronald on the phone, Mcreampies are back on the menu boys [cough, scum culture, cough]
Anyway, we've been sidetracked. So now we know what Decompose Paint is, what does it look like? Well, here's some works I've made with it in the past

Migraine, 2023
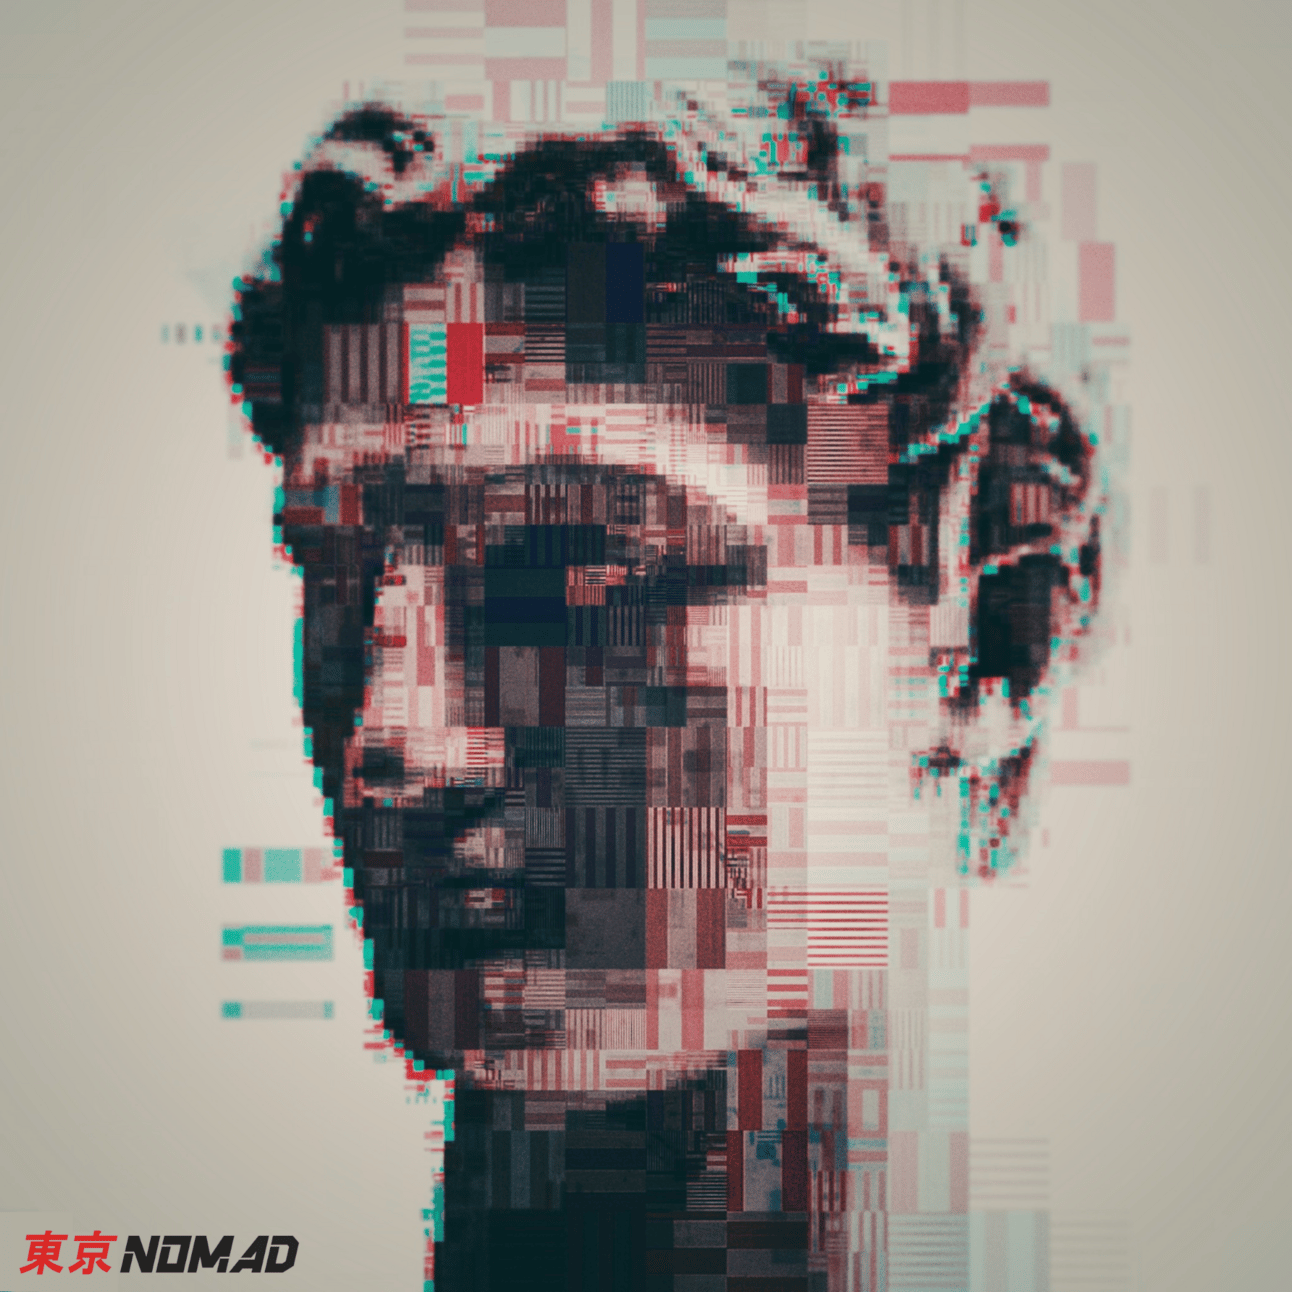
Digitally Preserved, 2023
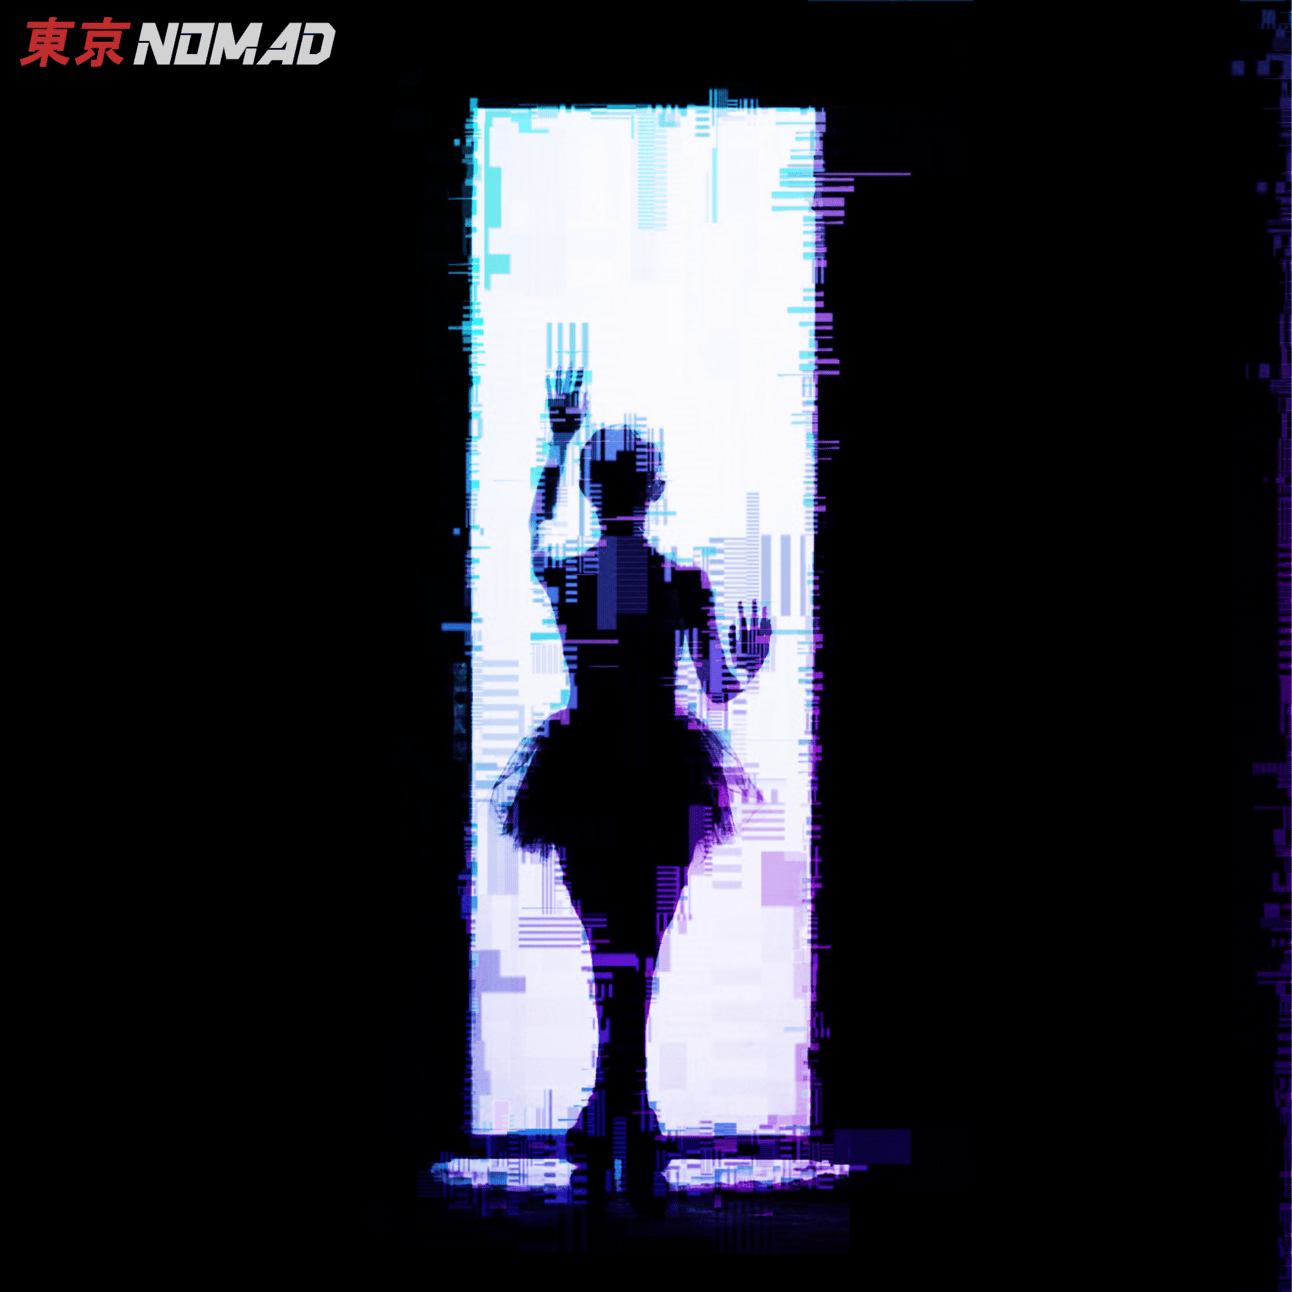
Threshold, 2024
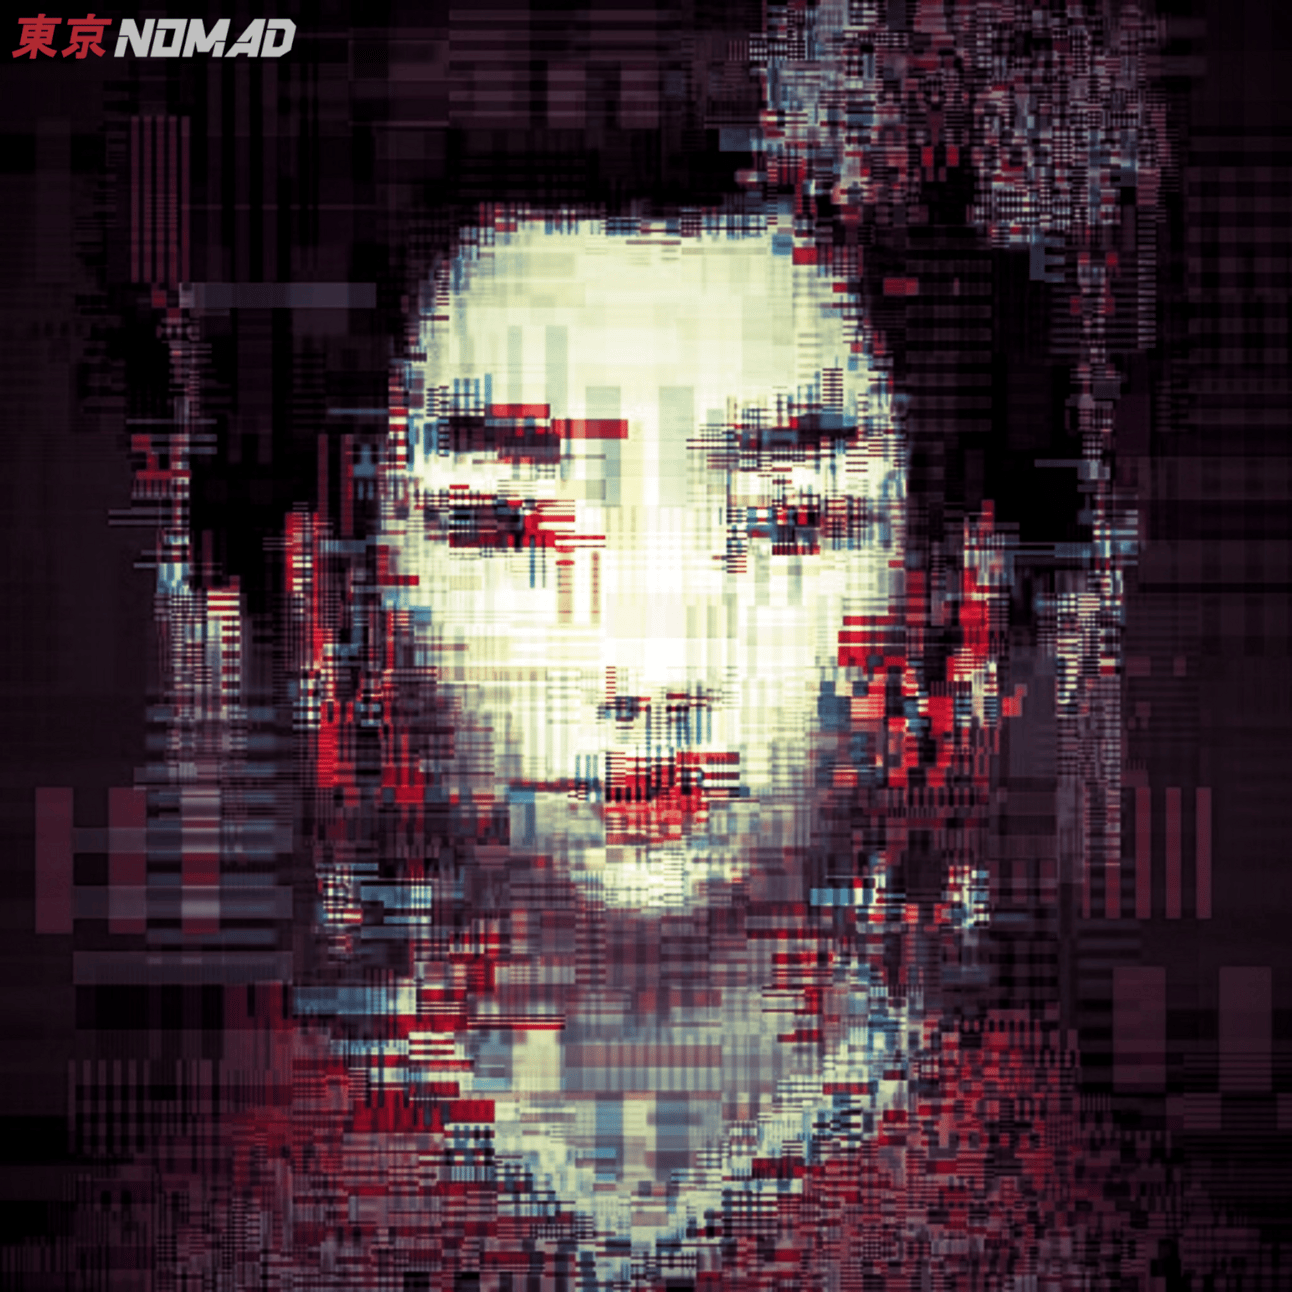
Echoes of Kabukicho, 2023
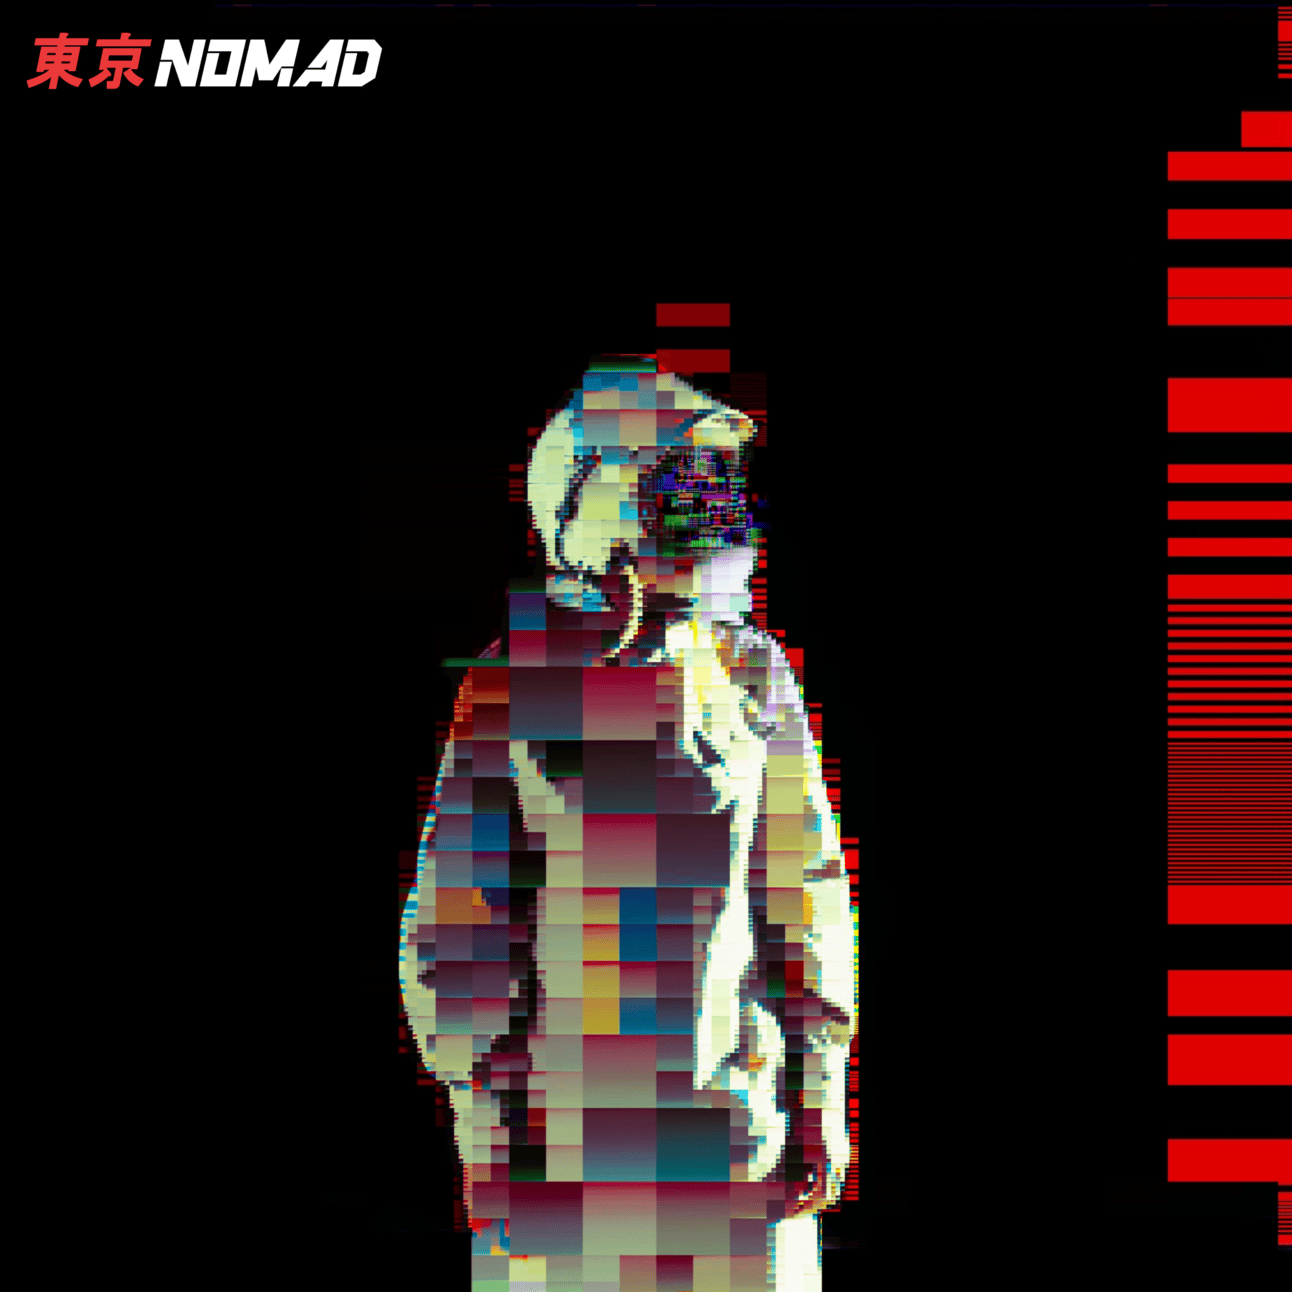
Disrupted Transmissions, 2024
Pretty cool, innit?
So this is another one of those scripts, like pix2line where you can just load up an image and keep clicking LMB to apply parameters randomly.
But what if you're some kind of control freak that can't handle that kind of chaos, and would actually like to be able to control the outputs like some kind of Glitch Whisperer?
Well, let’s take a look.
There are quite a few parameters to play with.
div_type
threshold
size
max size
block_type
stripes_size
blend
I'll go into each one in more detail, but here’s a what comes out with the default settings of:
div_type - RECTANGLES
threshold - 20
size - 8
max size - 64
block_type - V_STRIPES, H_STRIPES, VH_STRIPES, V_STRIPES
stripes_size - 0
blend - false
Hisashiburi bitches. I’m in the Matrix now.
There is somewhat of a random element to this as when I stopped running the code and press play again, the output was slightly different. The style was the same but the rectangles were all in different places, so if you find settings you like, it’s worth running the code a few times.
Alright, so let’s take a look at the most simple of the parameters, Blend mode. By default it’s turned off but if you turn it on it will overlay with the original image

I’m not going to show all the blend options, but it works with Burn, Difference, Subtract, Dodge. However, I’ve always found that I get the most interesting results with the Blend Parameter turned OFF. So that’s that then.
Anyway, let’s take a goosey gander at the first parameter that was on the list instead; div_type
div_type basically means what type of division the script applies, and the options are SQUARES, RECTANGLES, CONSTSIZE or RANDOM. CONSTSIZE, in idiot terminology, means that the squares are all the same size. We’ve already seen RECTANGLES in action, so let’s take a look at the others (with all other parameters being set as default.

Squares

Constsize

Random
All-in-all it has a fairly large impact on the output. I did find with Random that it seemed to affect some of the other parameters too because sometimes the rectangles seemed to be in particular colour channels (and some colour channels seemed to be turned off).
The next parameter is Threshold, which is how the rectangles/squares are divided up. The default number is 20, but you can change this to any number between 2-100. The smaller the number, the smaller the decomposition.

2

10
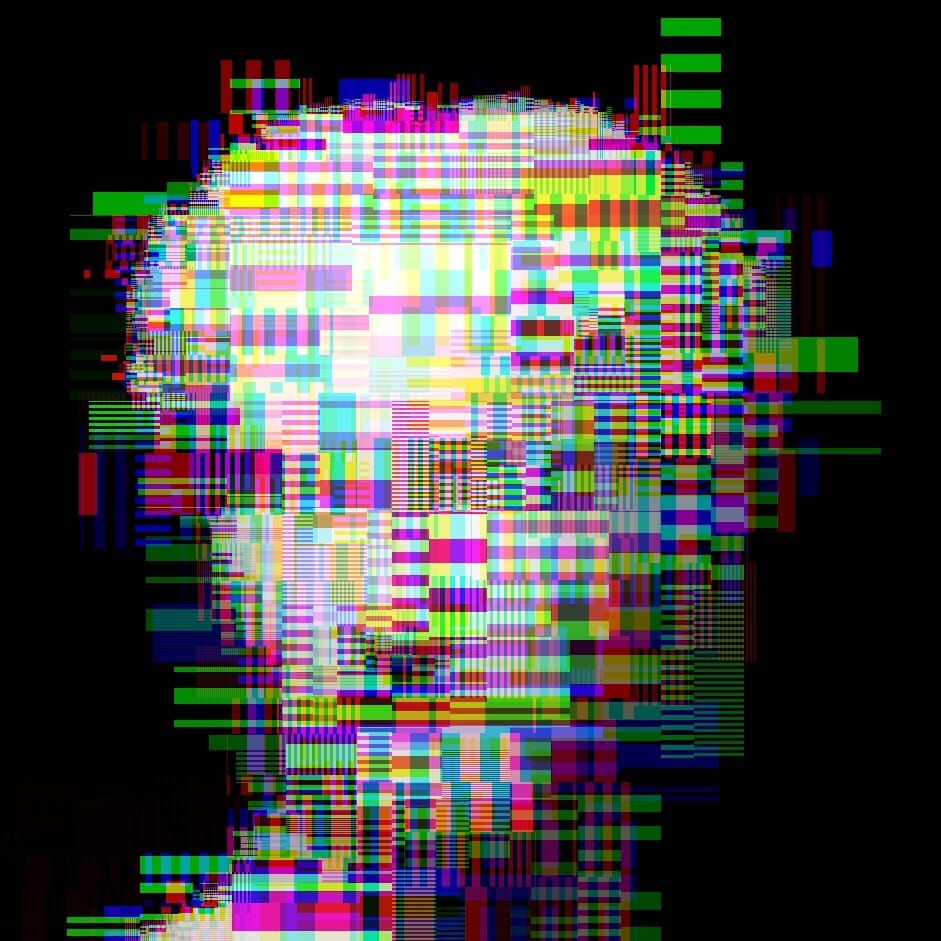
50

75

100

100 (Overlay blend)
With this particular parameter, it’s going to be a case of finding a nice balance so that you’re still able to make out the original image, but it’s not too small as to be unnoticeable. But you’re also going to need to keep in mind the size of the original image too as it’s not going to scale the effect for the size of the image.
Next up let’s take a look at size and max size. Size affects the size of the square and the minimum size of the block, and maxsize is the maximum block size. I’m having a hard time distinguishing the difference between what the script defines as Squares and Blocks.
My guess is that square refers to the square or rectangle that the image is divided up into during the decomposition (highlighted in blue), and blocks is the size of the blocks in the pattern that the squares/rectangles are filled with (highlighted in green).
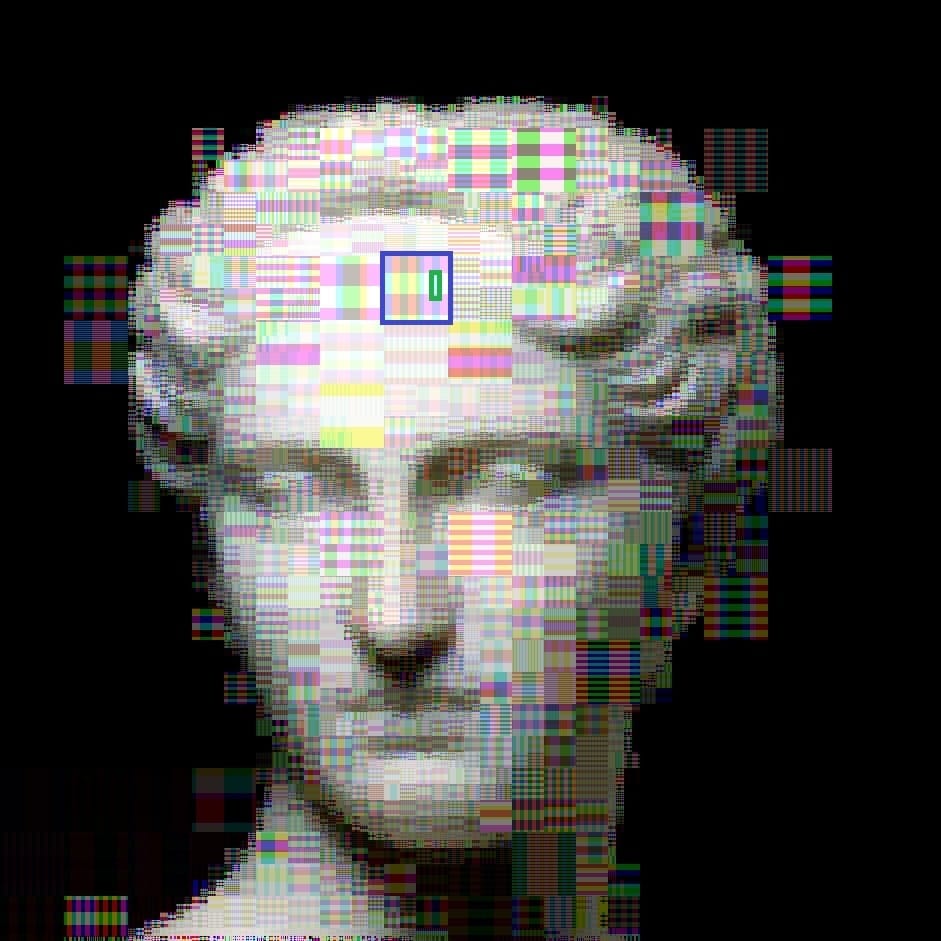
Bring on the examples
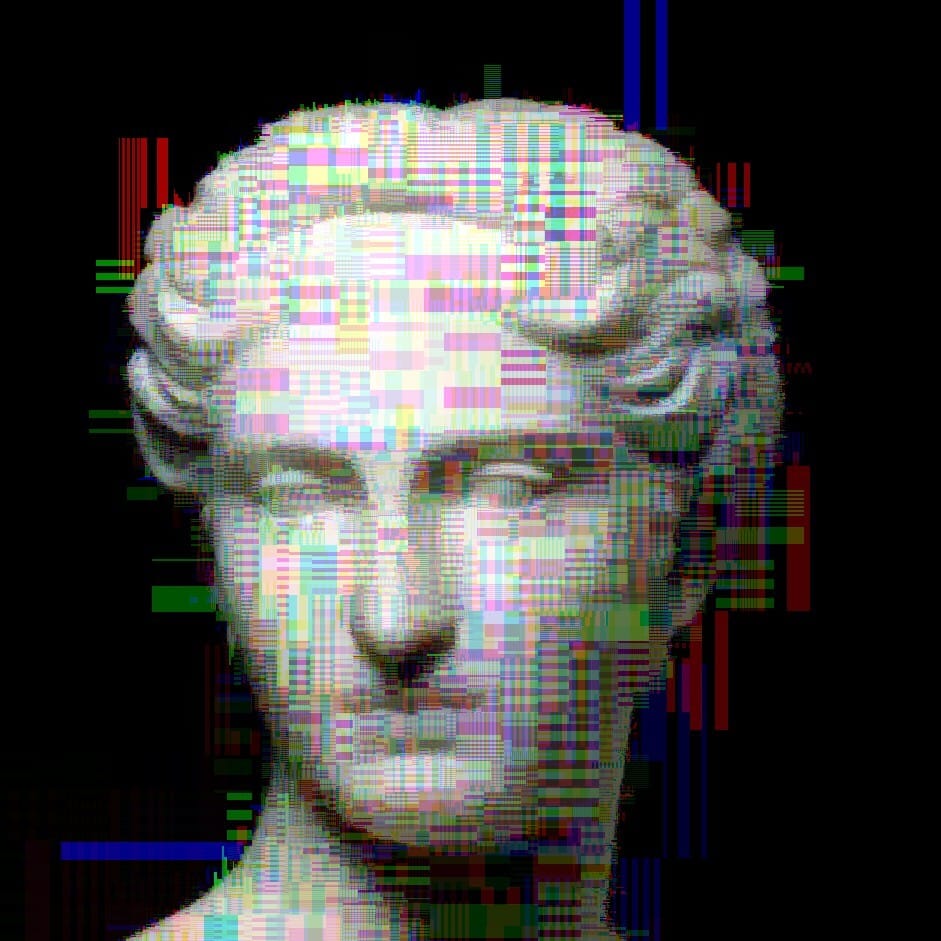
size 2, maxsize 64

size 4, maxsize 64
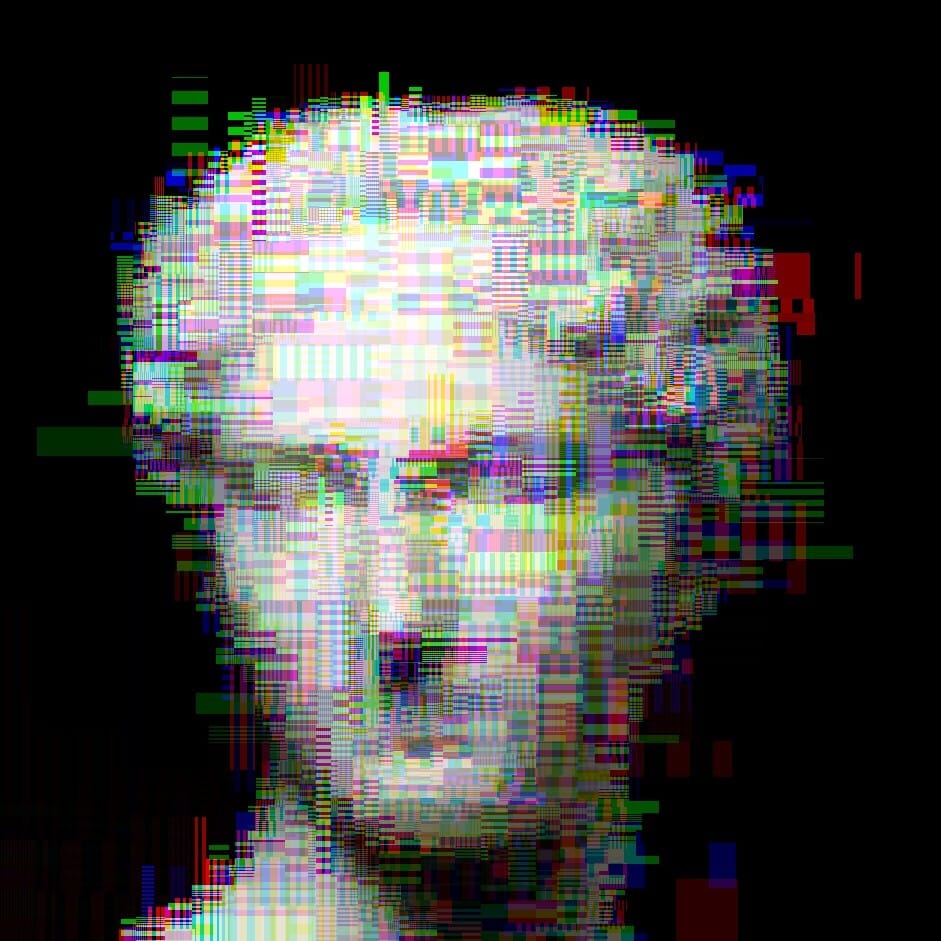
size 16, maxsize 64

size 16, maxsize 32

size 32, maxsize 64
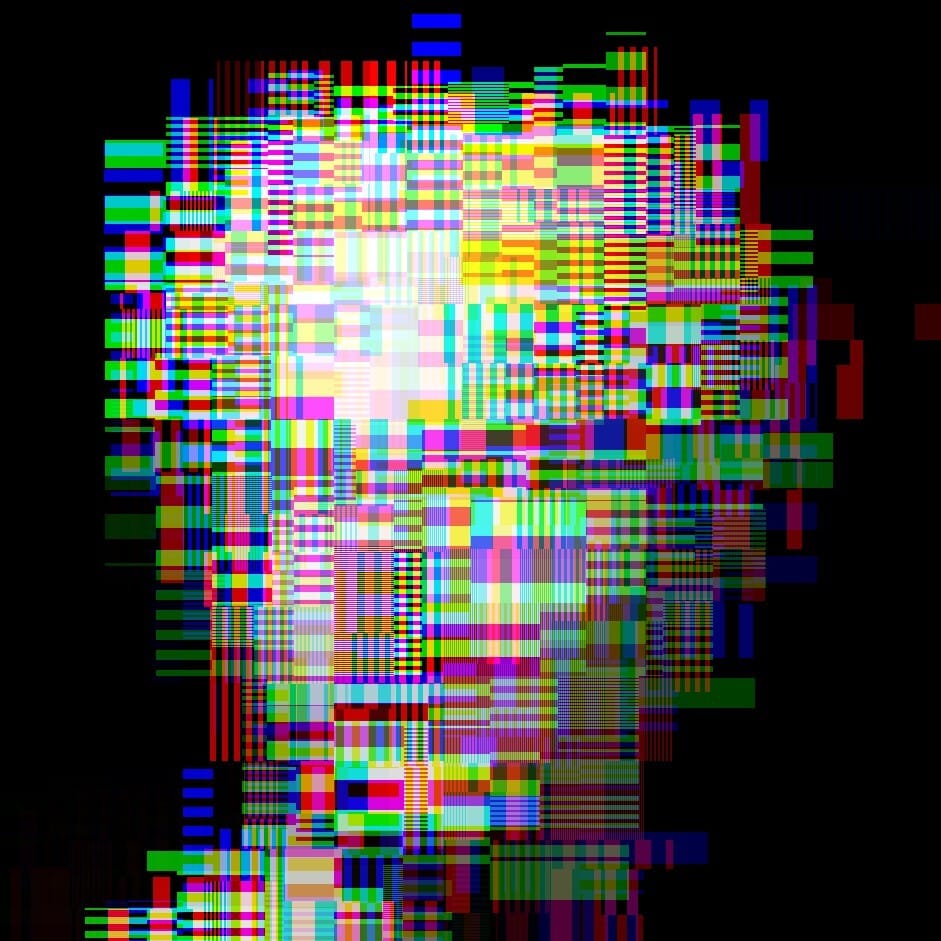
size 64, maxsize 64
So this is another setting like Threshold that changes the size of the squares, but with this one you’re able to more closely alter the ratio between the different sizes, as well as the patterns inside.
Next setting is the block type. There are 8 different patterns to choose from; ONECOLOR, SORT, LIGHT, DARK, V_STRIPES, H_STRIPES, VH_STRIPES and ANGLE. You can sent the patterns individually for the 4 different colour channels, RGBA.
For the purpose of the demo images, I’m just going to set each colour channel to the same pattern, but you can mix and match by just changing the text below (it’s written in the standard color order of RGBA).
int block_type[] = { V_STRIPES, H_STRIPES, VH_STRIPES, V_STRIPES};I set the Threshold as 50 so that blocks are bigger and the differences are a little more noticeable.
First up is ONECOLOR, which sets the block fill as one translucent color which gives blocky lo-res effect.

ONECOLOR
SORT does a similar thing, but it also has a lot more narrow bars that extend horizontally, kind of like it’s been pixelsorted.

SORT
LIGHT brings out the whites in the image more (so kind of like a lighten blend mode)

LIGHT
Whereas DARK does the opposite and the blocks are darker (kind of like the darker blend mode)

DARK
Finally, I’ll lump the three Stripes ones together; You’ve got vertical, horizontal, and both.

V_STRIPES

H_STRIPES

VH_STRIPES
And the final option is angle, which seems to give this soft gradient look.

Angle
You can also play with the stripes size a bit (which I’m assuming works with just the STRIPES pattern) - set it as 0 for a random number of stripes and 1 for 2 stripes.
So those are just the main settings you can play around with. Because I tried to only change one thing at a time to give you a clear idea of how each parameter effects the output, I really only scratched the service on some of the cool things you can do with this script. Here are a few more different looking things I made just playing around with multiple parameters at once.

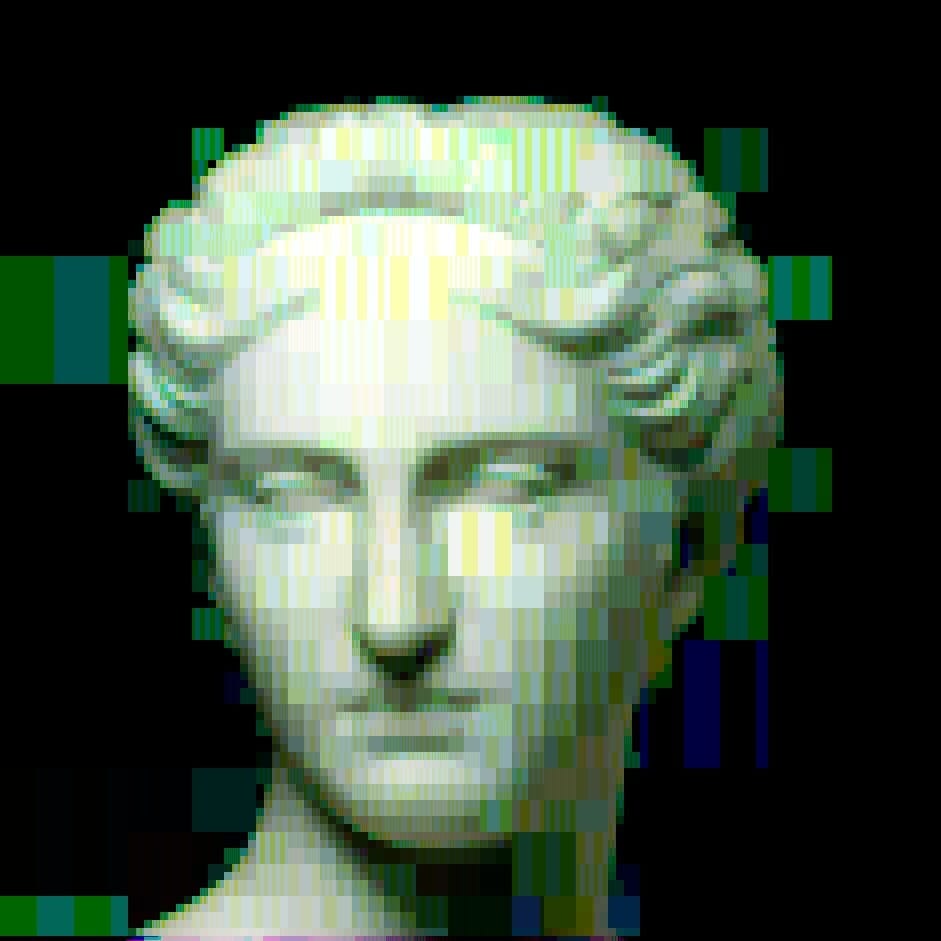

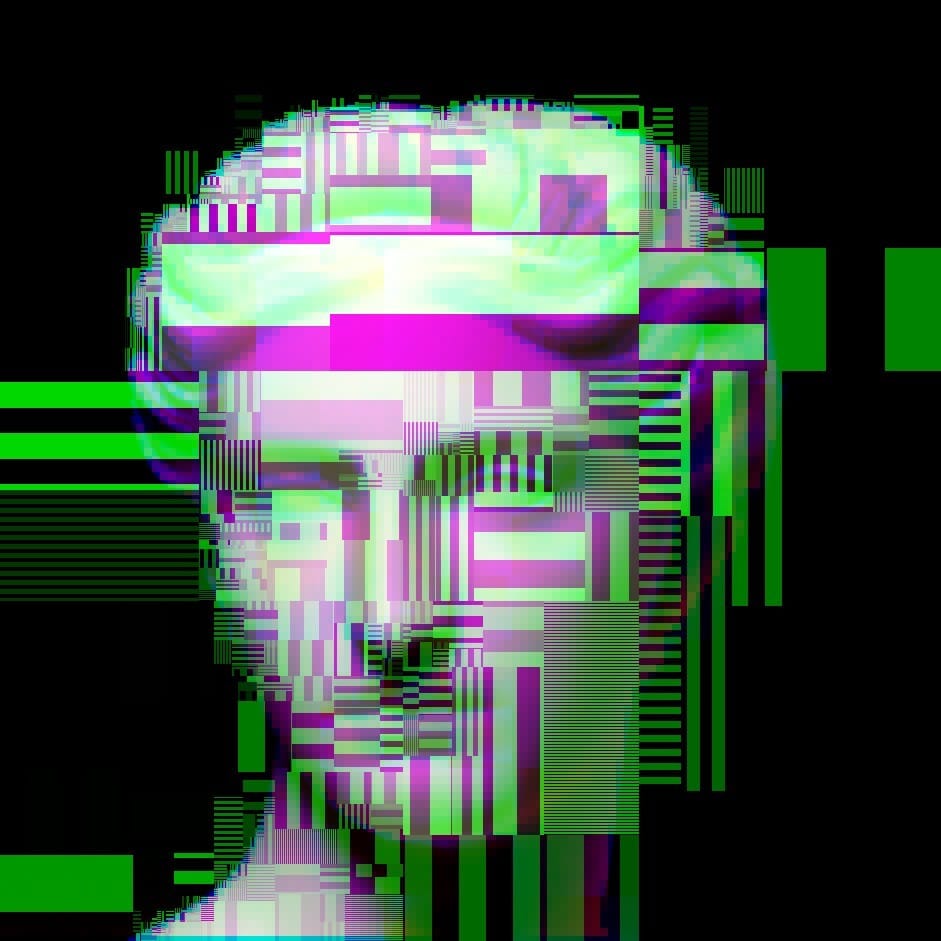
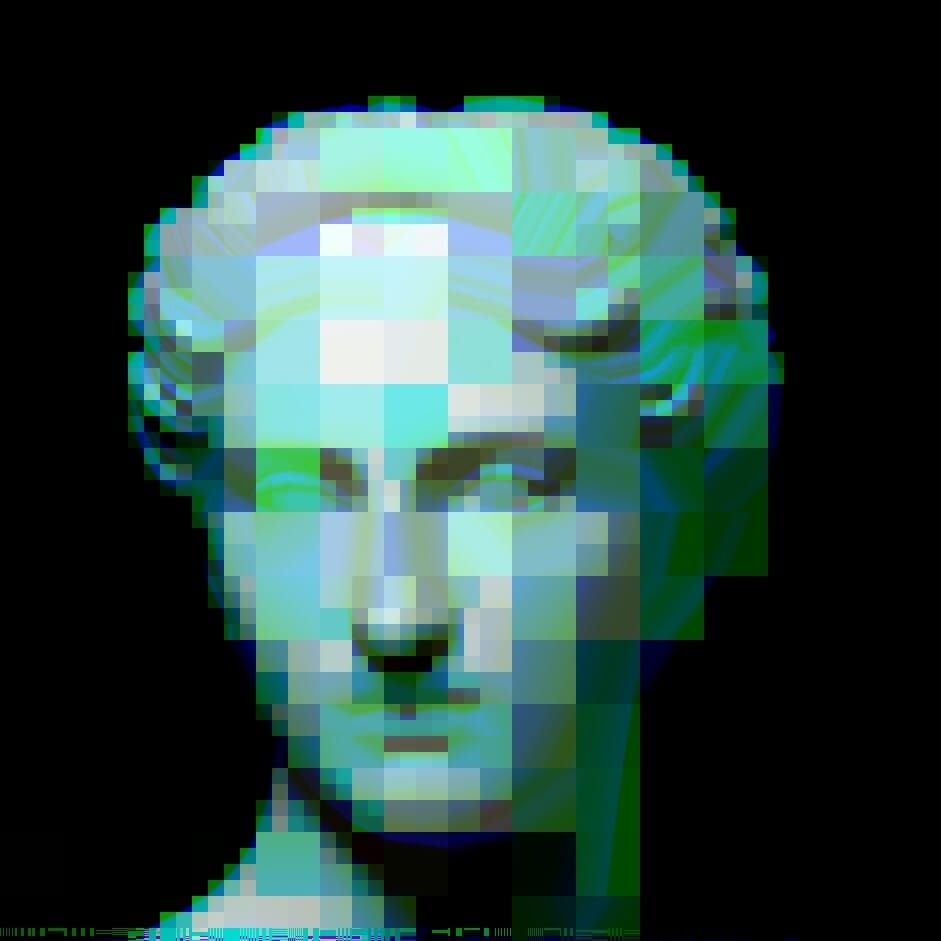

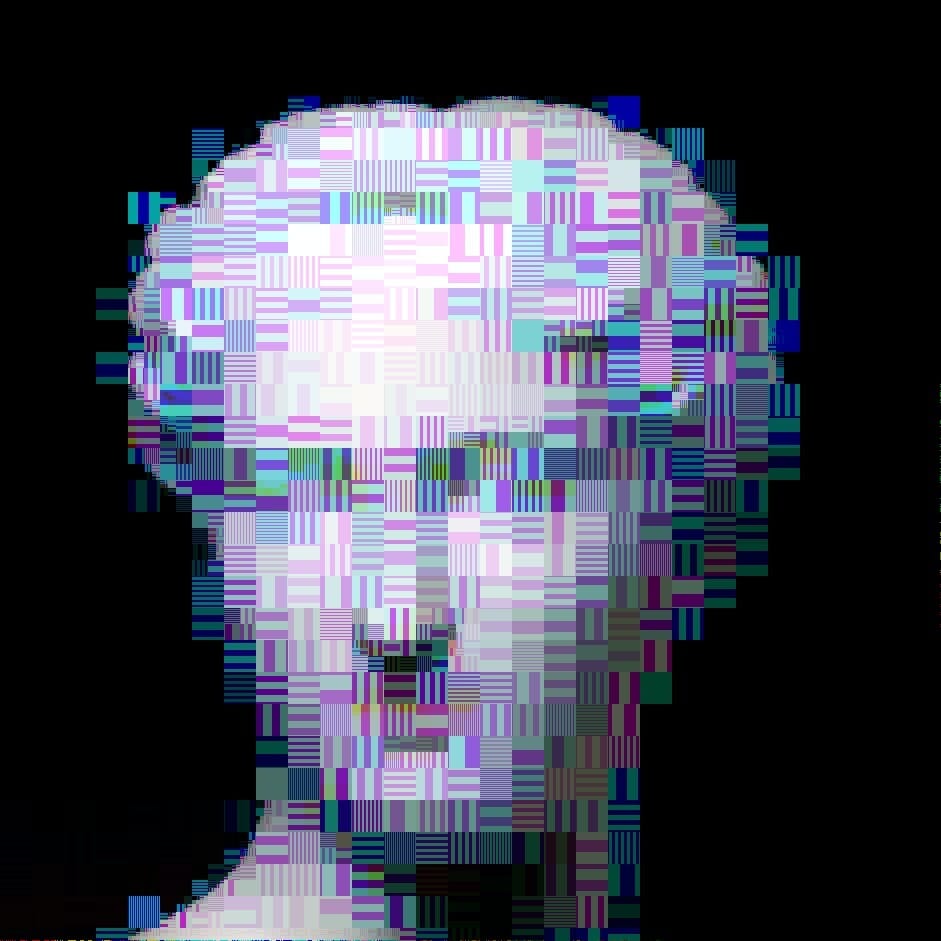
One last thing you can do is to edit the original image before you put it through the script. Depending on your pre-edits, it can vastly change the outputs.
Here’s some outputs on a version that I added dithering to.

original dither
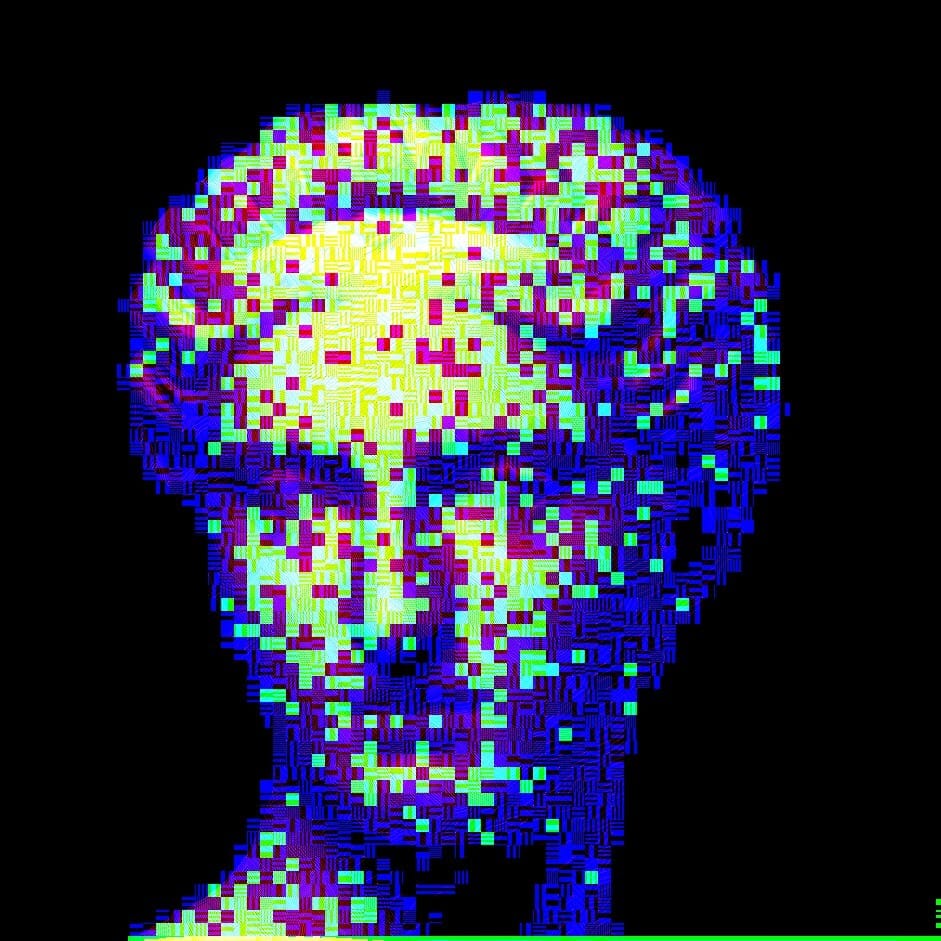
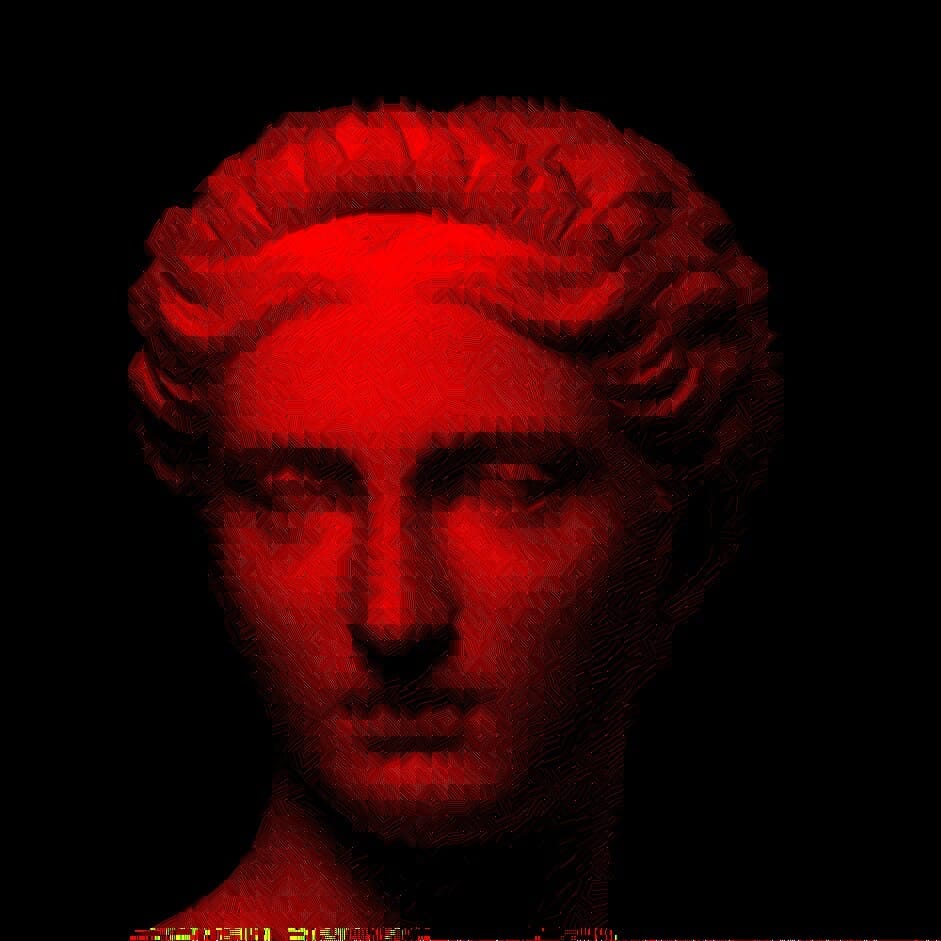
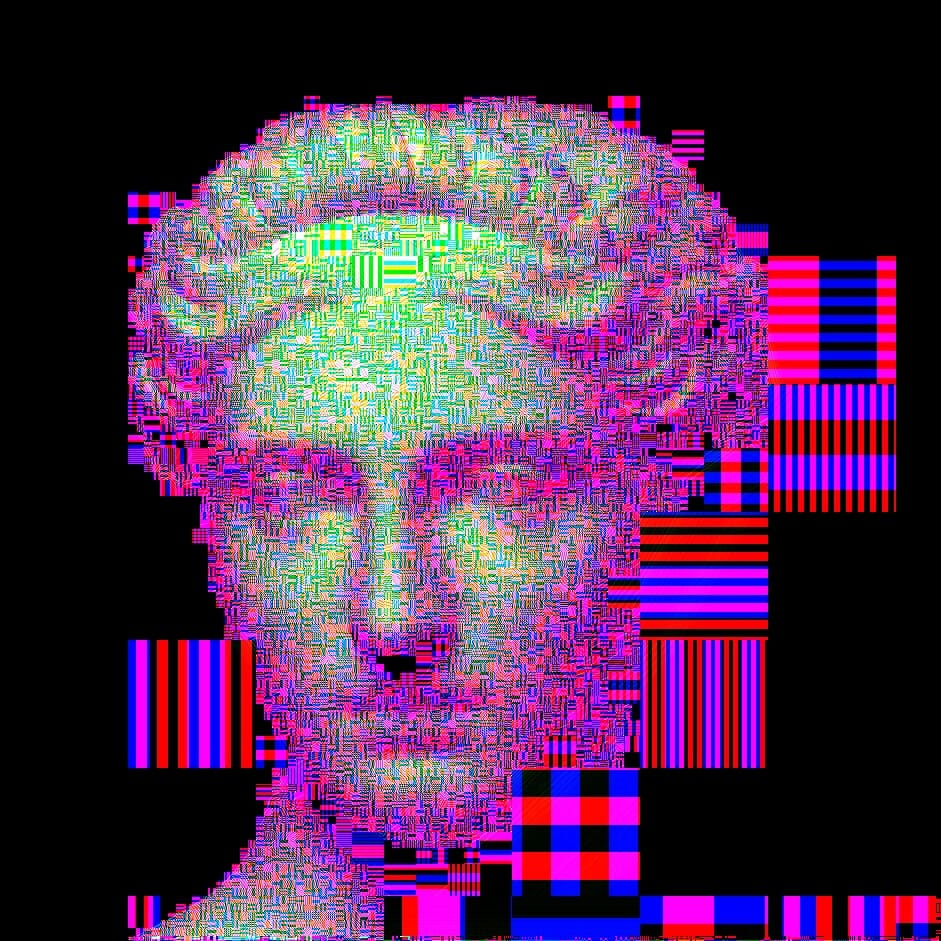
It’s pretty interesting how much that changes the output, because there’s no way you’d be able to generate anything like that with the original non-dithered image.
I’m kinda curious what other kind of things might change the outputs, like if the input image was semitransparent or if you added more noise or grain to the image beforehand. Or if you inverted the colors before running the script.
Anyway, that’s pretty much the end of the tutorial. If you have absolutely no idea what I’m yapping on about but want to try this tool out, you’ll need to learn about Processing first. I did a Primer Tutorial in Error Logs #8, so that’s a good place to start. After that, it’s worth checking out Error Logs #11 where I first introduced GenerateMe (the pack that contains the Decompose Paint script).
Let me know if you make anything interesting with it.
That brings us to the end of another issue. If you liked it, think about subscribing. If you didn’t like it, why the heck did you read ‘til the end? That’s on you, not me. Well, at least you only wasted 0.0000261% of your life.

